Article
Creating a ServiceNow Catalog with Attachment Upload and Auto-Update to a Table
Author: Agus Budi Harto, 2025-10-16 08:50:35
Creating a new catalog item in ServiceNow is relatively straightforward. Thanks to its user-friendly interface and the abundance of online tutorials and documentation, even beginners can get started quickly. However, things get a bit more complex when you're asked to build a catalog item that allows users to upload a spreadsheet attachment and automatically update a specific table—like the hardware asset table.
In this article, I’ll walk you through a practical, experience-based guide to building a ServiceNow catalog item that includes a downloadable template, allows users to upload a completed spreadsheet, and automatically imports the data into the alm_hardware table.
Overview of the Process
To achieve this, we’ll go through the following steps:
Create a Staging Table
Create a Transform Map
Set Up a Data Source
Configure a Scheduled Import
Write a Business Rule
Build the Catalog Item with Attachment Support
Let’s dive into each step using a simple use case: creating a catalog item called "Upload Asset".
1. Creating the Staging Table
The staging table acts as a temporary storage area for the uploaded spreadsheet data before it’s transformed and inserted into the alm_hardware table. To ensure compatibility, the staging table should mirror the structure of the target table.
1.1 Create the Table
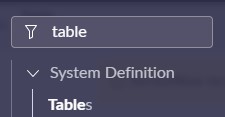
Navigate to All - System Definition - Tables, then click New.
Set the Label to something like
Imp Tmpl Alm Hardware. The Name field will auto-populate.For Extends table, select Import Set Row.
Click Submit.

1.2 Add Required Fields
Add fields to the staging table that match the structure and data types of the
alm_hardwaretable.For example, fields like
u_acquisition_method,u_model_id,u_serial_number, etc., should be created to align with the target table.
2. Creating the Transform Map
The transform map defines how data from the staging table is mapped and transferred to the target table.
2.1 Create the Transform Map
Go to All - System Import Sets - Administration - Transform Maps, then click New.

Set the Name to something like
Hardware import.Choose the Source table as your staging table (e.g.,
u_imp_tmpl_alm_hardware).Set Target table to
alm_hardware.Ensure Active and Run business rules are checked.
Click Update.

2.2 Map the Fields
In the transform map record, scroll down to the Field Maps section and click New.
Set the Source field (e.g.,
u_acquisition_method) and the corresponding Target field (e.g.,acquisition_method).Set Choice action to
Createand Coalesce toFalse.Repeat for all necessary fields.

3. Setting Up the Data Source
The data source defines how the uploaded file is retrieved and linked to the import process.
3.1 Create the Data Source
Navigate to All - System Import Sets - Administration - Data Sources, then click New.

Set the Name to something like
Hardware asset data.For Import set table name, select your staging table.
Set Type to
File, Format toExcel, and File retrieval method toAttachment.Click Update.

3.2 Link the Transform Map
In the data source record, scroll to the Related Links section and click Create Transform Map.
Select the transform map you created earlier (
Hardware import).
4. Configuring the Scheduled Import
Although we’ll trigger the import manually via a business rule, we still need to define a scheduled import.
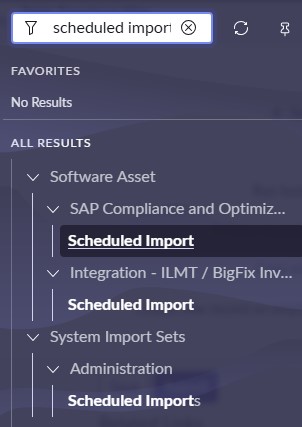
Go to All - System Import Sets - Administration - Scheduled Imports, then click New.
Set the Name to
Hardware asset data import.Choose the Data source you created earlier.
Set Active to
False(we’ll trigger it manually).Click Submit.

5. Writing the Business Rule
This business rule will detect when a user submits the catalog item and trigger the import process automatically.
Navigate to All - System Definition - Business Rules, then click New.
Set the Name to
PM - Upload Asset Attachment.Set the Table to
sc_req_item, and check Active and Advanced.Under the When to run tab:
Set When to
asyncCheck Insert
Add a filter:
Item is Upload Asset
Leave the Actions tab empty.
In the Advanced tab, paste the following script:
    var attachGR = new GlideRecord("sys_attachment");
    attachGR.addQuery("table_name", "ZZ_YY" + current.getTableName());
    attachGR.addQuery("table_sys_id", current.sys_id);
    attachGR.query();
    if (attachGR.next()) {
        attachGR.table_name = current.getTableName();
        attachGR.update();
        GlideSysAttachment.copy('sc_req_item', current.sys_id, 'sys_data_source', '72fcc59d1b1a06507bfd2022f54bcbfc');
    }
    var schImp_GR = new GlideRecord('scheduled_import_set');
    schImp_GR.addQuery('name', 'Hardware asset data import');
    schImp_GR.query();
    if (schImp_GR.next()) {
        SncTriggerSynchronizer.executeNow(schImp_GR);
    }
})(current, previous);
6. Building the Catalog Item with Attachment
Now it’s time to create the actual catalog item that users will interact with.
Navigate to Maintain Items and click New.
Set the Name to
Upload Asset.In the Questions tab:
Add a Downloadable Template (e.g., Excel file with required fields).
Add an Attachment variable to allow users to upload their completed spreadsheet.
Save and publish the catalog item.
Final Thoughts
With these steps, you’ve successfully created a ServiceNow catalog item that allows users to upload a spreadsheet and automatically update the hardware asset table. This approach streamlines asset management and reduces manual data entry errors.
Whether you're building this for internal IT operations or as part of a larger automation initiative, this pattern can be adapted for other tables and use cases across your ServiceNow environment.
Tags: Opinion Servicenow
Add comment
- Other Article
- Choosing the Right Framework: A Practical Guide to Best-Practice Problem-Solving Models12 Jul 2026
- Can Science Predict the World Cup? A Look at the Models Behind the 2026 Forecasts04 Jul 2026
- Corruption: A Global Plague, Landmark Cases, and the Path to Prevention27 Jun 2026
- Nations Driving Brilliant Business Ideas and Frameworks in 202620 Jun 2026
- Why the USD Stands Stronger than the IDR — and What Indonesia Can Do13 Jun 2026
- Employee vs. Entrepreneur: Who Bears the Heavier Tax Burden in Indonesia?03 Jun 2026
- The Evolution of Control Operating Centers (COC) in Modern Mining Operations24 May 2026
- Song of: Mariana Istriku13 May 2026
- Organisasi Pensiunan di Indonesia: Dari Komunitas Sosial Menuju Kekuatan Ekonomi Berbasis Pengalaman12 May 2026
- Corporate Risk Management: Why Modern Companies Invest Millions to Prevent Invisible Threats07 May 2026
- The Mining Spirit: A Powerful Mindset for Excellence in the Mining Industry25 Apr 2026
- The Double-Edged Sword: Navigating Competition in the Modern Corporate Landscape22 Apr 2026
- AI Chatbot untuk UMKM: Peluang Besar di Era Digital17 Apr 2026
- AI Chatbots in Business: The Global Revolution09 Apr 2026
- The Heartbeat of Your Business: Why the P&L Statement is Non-Negotiable31 Mar 2026
- Why Your New Business Needs a Financial System on Day One26 Mar 2026
- The Link Between Startup Capital, Business Survival, and the Role of Investor Information21 Mar 2026
- Digital Transformation, Digitalization, and Digitization: Why the Difference Matters More Than You Think14 Mar 2026
- From Business Need to Technology Solution07 Mar 2026
- Bridging the Digital Divide: Starlink and the Future of Internet Access in Indonesia27 Feb 2026
- A Long Weekend Getaway to Yogyakarta16 Feb 2026
- Understanding ERP Systems: A Comprehensive Guide for Modern Businesses16 Feb 2026
- Building a Culture of Awareness: Strategic Approaches to HSE and Information Security Campaigns in Modern Organizations10 Feb 2026
- Building an Effective IT Organization in Coal Mining: A Strategic Framework for Growth02 Feb 2026
- The Art and Science of Color Themes in Modern Web Design17 Jan 2026
- IT Outsourcing vs Internal Resources: A Comprehensive Cost and Risk Analysis05 Jan 2026
- The Hidden Dangers of Mishandled Employee Data: When Internal Tables Fall Into the Wrong Hands05 Jan 2026
- Securing SQL Server: A Complete Guide to Database Access Control05 Jan 2026
- Beyond Human Error: Understanding the Complete Security Chain in Information Security01 Jan 2026